Enterprise Objects Framework предшественник Core Data работал с такими базами данных как Oracle, Sybase, OpenBase и Informix.
На iOS таблицы имеют много строк и один столбец. На Mac OS может быть множество столбцов.
Главные компоненты:
Cell. UITableView состоит из ячеек. Ячейки могут содержать данные в форме изображения и/или текста, также они могут содержать элементы позволяющие выбирать, кнопки, галочки. Примеры ячеек на рисунке снизу слева: Location Services, General, Twitter, Safari, и Photos.

Sections. Таблица также может содержать секции. На рисунке выше справа видно заголовки секций: General, Privacy, и Security. Секция Security также имеет footer (Warn when visiting fraudulent websites). У третьей группы (Clear History and Clear Cookies and Data) нет ни заголовка ни footer-a.
Accessory View. Ячейки могут иметь дополнительный вид, который обычно располагается справа. Дополнительный вид может содержать disclosure triangle или настройки как показано на рисунке выше для Safari. Еще может быть изображение или текст как для Location Services.

По умолчанию, если запускать проект для iPad 2, то он выглядит так:

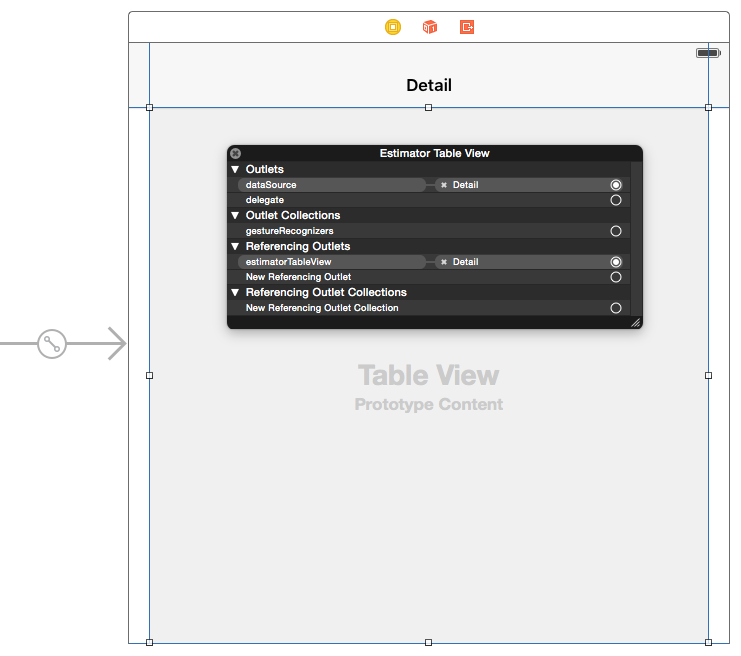
Очистим детальный вид и добавим туда компонент UITableView.

И прокинем outlet на созданную таблицу в файл DetailViewController.h.
Класс DetailViewController унаследован от UIViewController. Также нужно принять протокол UITableViewDataSource. Потом надо указать источник данных для таблицы:

Также нужно реализовать соответствующие методы:
Параметр indexPath типа NSPathIndex передается в метод tableView: cellForRowAtIndexPath: и содержит два значения: секцию (myIndex.section) и строку (myIndex.row).
Table view может кэшировать ячейку, которую можно потом повторно использовать. Это улучшает производительность и расходование памяти потому что не нужно создавать ячейку на каждую строку.
Каждая ячейка UITableViewCell имеет свойство textLabel.

Для того чтобы добавить группировку в таблицу, надо в класс DetailViewController добавить следующие методы:
Каждый UITableViewCell может иметь свой стиль.


Sections. Таблица также может содержать секции. На рисунке выше справа видно заголовки секций: General, Privacy, и Security. Секция Security также имеет footer (Warn when visiting fraudulent websites). У третьей группы (Clear History and Clear Cookies and Data) нет ни заголовка ни footer-a.
Accessory View. Ячейки могут иметь дополнительный вид, который обычно располагается справа. Дополнительный вид может содержать disclosure triangle или настройки как показано на рисунке выше для Safari. Еще может быть изображение или текст как для Location Services.
UITableView без Core Data
Создадим новый проект:
По умолчанию, если запускать проект для iPad 2, то он выглядит так:

Очистим детальный вид и добавим туда компонент UITableView.

И прокинем outlet на созданную таблицу в файл DetailViewController.h.
@property (weak, nonatomic) IBOutlet UITableView *estimatorTableView;
Класс DetailViewController унаследован от UIViewController. Также нужно принять протокол UITableViewDataSource. Потом надо указать источник данных для таблицы:
Также нужно реализовать соответствующие методы:
#pragma mark - UITableViewDataSource Protocol

- (NSInteger)tableView:(UITableView *)tableView numberOfRowsInSection:(NSInteger)section
{
    return 7;
}

// Customize the appearance of table view cells.
- (UITableViewCell *)tableView:(UITableView *)tableView cellForRowAtIndexPath:(NSIndexPath *)indexPath
{
    static NSString *CellIdentifier = @"Cell";
    UITableViewCell *cell = [tableView dequeueReusableCellWithIdentifier:CellIdentifier];
    if (cell == nil) {
        cell = [[UITableViewCell alloc] initWithStyle:UITableViewCellStyleDefault reuseIdentifier:CellIdentifier];
    }
    // Configure the cell.
    cell.textLabel.text = @"test";
    return cell;
}
Параметр indexPath типа NSPathIndex передается в метод tableView: cellForRowAtIndexPath: и содержит два значения: секцию (myIndex.section) и строку (myIndex.row).
Table view может кэшировать ячейку, которую можно потом повторно использовать. Это улучшает производительность и расходование памяти потому что не нужно создавать ячейку на каждую строку.
Каждая ячейка UITableViewCell имеет свойство textLabel.

Для того чтобы добавить группировку в таблицу, надо в класс DetailViewController добавить следующие методы:
// Customize the number of sections in the table view.
- (NSInteger)numberOfSectionsInTableView:(UITableView *)tableView
{
    return 4;
}

// Customize section titles
- (NSString *)tableView:(UITableView *)tableView
titleForHeaderInSection:(NSInteger)section
{
    switch (section)
    {
        case 0:
        {
            return @"UITableViewStyleDefault";
        }
        case 1:
        {
            return @"UITableViewStyleValue1";
        }
        case 2:
        {
            return @"UITableViewStyleValue2";
        }
        case 3:
        {
            return @"UITableViewStyleSubtitle";
        }
    }
    return nil;
}
- (NSString *)tableView:(UITableView *)tableView
titleForFooterInSection:(NSInteger)section
{
    switch (section)
    {
        case 0:
        {
            return @"End of UITableViewStyleDefault";
        }
        case 1:
        {
            return @"End of UITableViewStyleValue1";
        }
        case 2:
        {
            return @"End of UITableViewStyleValue2";
        }
        case 3:
        {
            return @"End of UITableViewStyleSubtitle";
        }
    }
    return nil;
}
Каждый UITableViewCell может иметь свой стиль.

// Customize the appearance of table view cells.
- (UITableViewCell *)tableView:(UITableView *)tableView
         cellForRowAtIndexPath:(NSIndexPath *)indexPath
{
    static NSString *CellIdentifier0 = @"Cell0";
    static NSString *CellIdentifier1 = @"Cell1";
    static NSString *CellIdentifier2 = @"Cell2";
    static NSString *CellIdentifier3 = @"Cell3";
    UITableViewCell *cell;
    switch (indexPath.section)
    {
        case 0:
        {
            cell = [tableView dequeueReusableCellWithIdentifier:CellIdentifier0];
            if (cell == nil) {
                cell = [[UITableViewCell alloc] initWithStyle:UITableViewCellStyleDefault
                                              reuseIdentifier:CellIdentifier0];
            }
            break;
        }
        case 1:
        {
            cell = [tableView dequeueReusableCellWithIdentifier:CellIdentifier1];
            if (cell == nil) {
                cell = [[UITableViewCell alloc] initWithStyle:UITableViewCellStyleValue1
                                              reuseIdentifier:CellIdentifier1];
            }
            break;
        }
        case 2:
        {
            cell = [tableView dequeueReusableCellWithIdentifier:CellIdentifier2];
            if (cell == nil) {
                cell = [[UITableViewCell alloc] initWithStyle:UITableViewCellStyleValue2
                                              reuseIdentifier:CellIdentifier2];
            }
            break;
        }
        case 3:
        {
            cell = [tableView dequeueReusableCellWithIdentifier:CellIdentifier3];
            if (cell == nil) {
                cell = [[UITableViewCell alloc] initWithStyle:UITableViewCellStyleSubtitle
                                              reuseIdentifier:CellIdentifier3];
            }
            break;
        }
    } // end switch
    // Configure the cell.
    cell.textLabel.text = @"Text Label";
    cell.detailTextLabel.text = @"Detail Text Label";
    return cell;
}
UITableView c Core Data
Для начала создадим метки для ячеек:

Всё что осталось это проставить значения. Ранее мы это делали так:
Теперь так:

// Customize the appearance of table view cells.
- (UITableViewCell *)tableView:(UITableView *)tableView
         cellForRowAtIndexPath:(NSIndexPath *)indexPath
{
    static NSString *CellIdentifier = @"CellStyle2";
    UITableViewCell *cell = [tableView dequeueReusableCellWithIdentifier:
                             CellIdentifier];
    if (cell == nil) {
        cell = [[UITableViewCell alloc] initWithStyle:UITableViewCellStyleValue2
                                      reuseIdentifier:CellIdentifier];
    }
    // Configure the cell for each row
    switch (indexPath.row)
    {
        case 0:
        {
            cell.textLabel.text = @"Name";
            break;
        }
        case 1:
        {
            cell.textLabel.text = @"Email";
            break;
        }
        case 2:
        {
            cell.textLabel.text = @"Address";
            break;
        }
        case 3:
        {
            cell.textLabel.text = @"City";
            break;
        }
        case 4:
        {
            cell.textLabel.text = @"State/Province";
            break;
        }
        case 5:
        {
            cell.textLabel.text = @"Postal Code";
            break;
        }
        case 6:
        {
            cell.textLabel.text = @"Customer Since";
            break;
        }
    } // end switch
    return cell;
}
Всё что осталось это проставить значения. Ранее мы это делали так:
self.name.text = [self.detailItem valueForKey:@”name”];
Теперь так:
cell.textLabel.text = [self.detailItem valueForKey:@”name”];